Creating a Bird In Seven Easy steps
Birds are one of the most diversified animals in the world that we could find in nature. They come from vigorous and giant. They could be eagles and ostriches or hummingbirds. There are millions of birds on the planet. If you are a bird lover and you want to immortalize the birds drawings or paintings; it is time to draw. Do not worry if you do not know how to draw. This guide will help you how to draw a bird.
How to draw a bird – Follow these steps below

Step 1: Find a light pencil

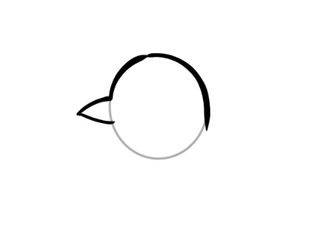
Why should you need to use a light pencil? This is because the pencil helps you create medium-sized circles. Using a drawing compass probably supports you in making a completed circle.
When you have a guiding circle, change a dark pencil to highlight the circle again. Do not forget to draw a small bird break on the left-hand side. Then, you slightly draw the top of the head.
Step 2: Start the body part

To begin with the body part, you need to focus on the bird’s chest. Draw three moderately curved lines and keep them from the bottom of the break to the chest. Once you have gotten the chest, continue another curved line to draw the back of the bird.
Step 3: Create the bird’s tail

A nice tail might decide whether the drawing is beautiful or not. Thus, you should take the time to draw the tail carefully. A combination of straight and curved lines can create a beautiful tail. Remember to connect it. Observe the reference picture first so that you understand how the lines connect.
Step 4: Move to the legs and bird’s beak

In this step, you draw their legs and beak. Your drawing is genuinely starting to come together.
Step 5: Complete the drawing with eyes and feather details

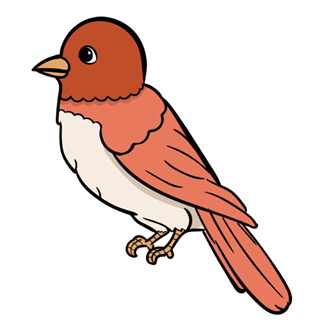
To finish your drawing, you should add eyes and feathers. For the eyes, create a few small circles in a few bigger circles (see them in the reference image). If it is difficult for you, then you could draw a circle with small dots inside or create a strong black dot. For the feather details, draw plenty of wavy lines and small straight ones slowly.
Step 6: Do not forget to add the wing and bird’s tail

The bird needs to have wing and tails in the drawing, so adding lines for details. All of lines in this step make the entire bird looks smoothly.
Step 7: Put colors into the drawing

Your bird appears on the paper but it looks simple. Therefore, add colors to it. Depending on how well-known the bird species you are in; combine colors wisely. You can select watercolors or acrylic paints for a classic look or a striking one.
Your Bird Drawing Is Complete
Drawing a bird requires many circles, but you should also find the angles to create different parts. The head, the chest, the tail, the eyes, the wing, the beak, and the legs need to meet together. When you have reached this point, your bird drawing will be taking good shapes.
