Drawing an airplane can seem daunting at first, especially for those who are new to drawing or have never attempted to draw a complex object before. However, with the right approach and a little practice, anyone can learn how to draw an airplane step by step. LET GO !
How to Draw an Airplane: A Step-by-Step Tutorial for Kids
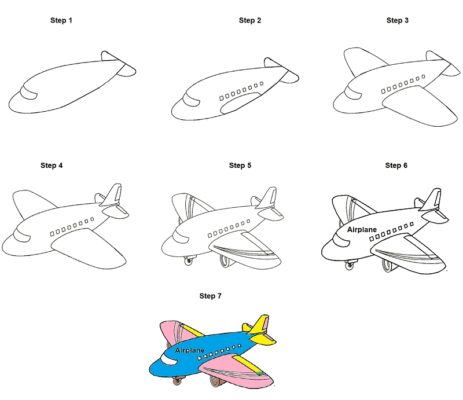
Step 1: Draw the basic shapes

Begin by drawing a long, horizontal line across the center of the page. This will be the base of the airplane’s body. Then, draw a small, curved shape at one end of the line to represent the cockpit of the airplane. The cockpit should be slightly raised from the rest of the body. Next, draw a large, oval shape at the other end of the horizontal line. This will be the main body of the airplane. Use a ruler to ensure that the lines are straight and the shapes are symmetrical.
Step 2: Add details to the body
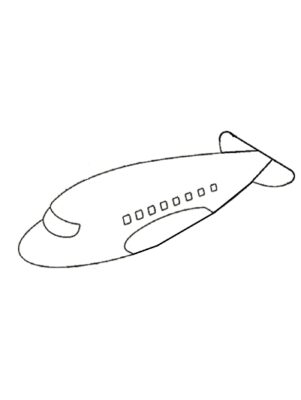
Once you have the basic shapes in place, you can start adding details to the body of the airplane. Draw a vertical line down the middle of the oval shape to separate it into two sections. These will be the wings of the airplane. Then, draw two diagonal lines from the top of the oval shape to the bottom, starting at the midpoint of the vertical line. These will be the tail wings of the airplane. Add small details such as the windows and doors of the airplane as well.
Step 3: Sketch in the wings
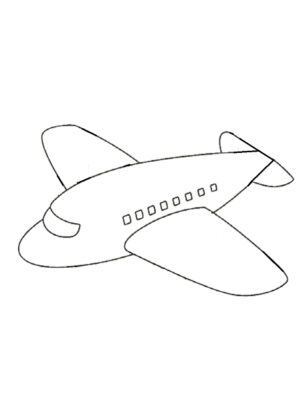
Using the vertical line you drew in Step 3 as a guide, sketch in the airplane’s wings. Draw a long, thin rectangle for each wing, with the top of the rectangle touching the top of the oval shape. Then, draw two smaller rectangles on each wing, one near the top and one near the bottom. These will be the flaps of the airplane’s wings. Draw a small triangle at the end of each wing to represent the wingtip.
Step 4: Draw the tail
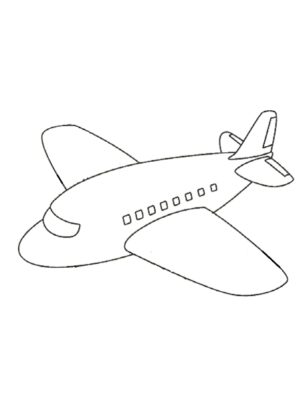
Next, sketch in the tail of the airplane. Use the diagonal lines you drew in Step 3 as a guide. Draw a rectangle that connects the two diagonal lines near the bottom of the airplane’s body. Then, draw a smaller rectangle near the top of the tail, as well as a small triangle at the end of the tail to represent the tailfin.
Step 5: Add shading and details
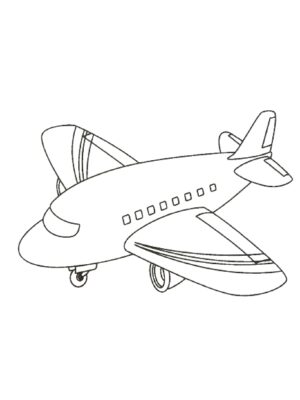
Now that you have the basic structure of the airplane drawn, you can start adding shading and details to give it a more realistic look. Use your pencil to shade in the areas that would be in shadow, such as the underside of the wings and the tail. Add small details such as the engine and landing gear of the airplane as well.
Step 6: Refine your drawing
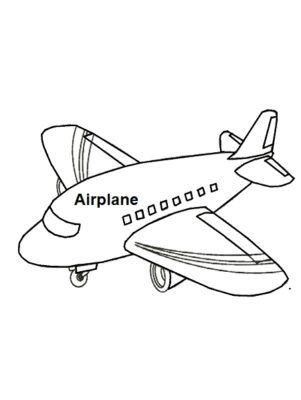
Once you have all the basic details in place, take a step back and look at your drawing as a whole. Make any necessary adjustments to ensure that everything looks proportional and symmetrical. Use your eraser to clean up any smudges or mistakes.
Step 7: Color Airplane
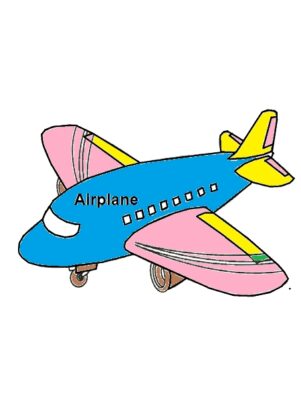
There are many different color schemes you can choose from, ranging from realistic to imaginative. When coloring an airplane, it’s also important to pay attention to details like shadows and highlights to make your drawing look more realistic and dynamic.
Tip On How to Draw an Airplane
- Use a reference image: When you’re learning how to draw an airplane, it’s important to have a reference image to use as a guide. This will help you understand the proportions and details of the airplane, and will make your drawing more accurate.
- Practice drawing different angles: Airplanes are three-dimensional objects, so it’s important to practice drawing them from different angles. Try drawing an airplane from the front, side, and back to improve your understanding of the shape and structure.
- Pay attention to details: Airplanes have many small details that can make a big difference in the overall look of your drawing. Take the time to add details such as rivets, antennas, and landing gear to make your drawing more realistic.
- Use shading to create depth: Shading is an important technique that can help create depth and dimension in your drawing. Use a light touch with your pencil to create subtle variations in tone that will make your drawing look more three-dimensional.
- Experiment with different materials: While pencil and paper are great for practicing, don’t be afraid to experiment with different materials such as charcoal or colored pencils. Each material has its own unique properties that can help you achieve different effects in your drawing.
- Don’t be afraid to make mistakes: Drawing is a process of trial and error, so don’t be discouraged if your drawing doesn’t turn out perfectly on the first try. Keep practicing and learning from your mistakes, and you’ll improve over time.
- Have fun with it: Drawing is a fun and rewarding hobby, so don’t forget to enjoy the process! Take your time, experiment with different techniques, and have fun creating your own unique airplane drawings.
FAQs On How to Draw an Airplane
Q: Is it necessary to use a ruler when drawing an airplane?
A: While it’s not absolutely necessary to use a ruler when drawing an airplane, it can be helpful in ensuring that your lines are straight and your shapes are symmetrical. However, if you’re more comfortable freehand drawing, that’s perfectly fine too!
Q: What’s the best way to practice drawing airplanes?
A: The best way to practice drawing airplanes is to draw them from different angles and with different levels of detail. You can also try drawing different types of airplanes, such as commercial airliners, military fighter jets, or vintage planes.
Q: How can I make my airplane drawing look more realistic?
A: To make your airplane drawing look more realistic, focus on adding details such as shading, highlights, and small features like windows and rivets. It’s also important to pay attention to the proportions and shapes of the airplane, as well as the way it interacts with the surrounding environment.
Q: Can I use a reference image when drawing an airplane?
A: Yes, using a reference image can be very helpful when drawing an airplane. It can help you understand the proportions, details, and angles of the airplane, and can make your drawing more accurate and realistic.
Q: What materials do I need to draw an airplane?
A: All you really need to draw an airplane is a pencil and paper. However, you may also want to use an eraser, ruler, and shading tools like charcoal or graphite pencils to add depth and texture to your drawing.
Your Airplane is Completed!
In conclusion, drawing an airplane step by step can seem intimidating, but it’s a fun and rewarding challenge. By following these basic steps and practicing regularly, anyone can learn how to draw an airplane that looks realistic and visually appealing.
