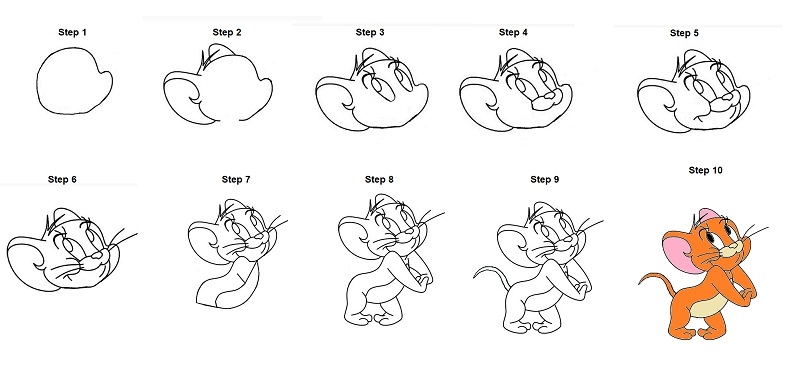
Drawing cartoons is a great way to express creativity and have fun. One of the most iconic cartoon characters is Jerry Mouse, the cute and mischievous mouse from the Tom and Jerry show. If you are a fan of the show or just want to learn how to draw Jerry Mouse, then you are in luck! In this article, we will provide you with step-by-step instructions on how to draw Jerry Mouse.
How to Draw Jerry Mouse – Step by Step Easy Drawing For Kids
Step 1: Start with a Circle
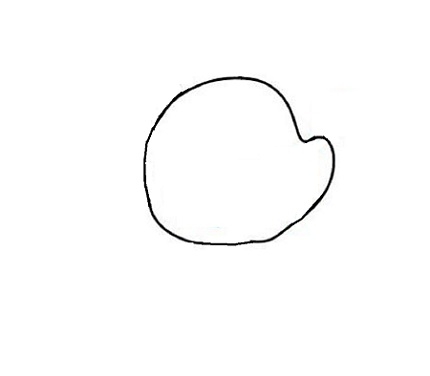
To begin drawing Jerry Mouse, start by drawing a circle for the head. This circle will be the foundation for the rest of the drawing. Make sure the circle is proportional to the size you want Jerry’s head to be.
Step 2: Add the Ears
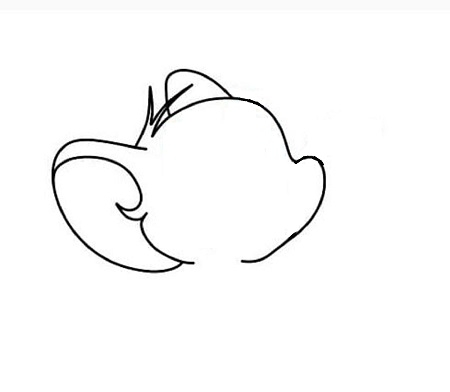
Jerry has large, round ears that sit on top of his head. Draw two curved lines on either side of the head that meet at the top to form the ears.
Step 3: Draw the Eyes
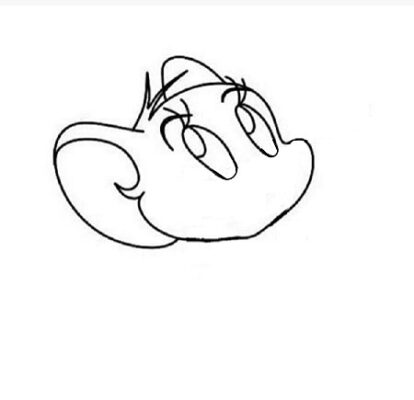
Now it’s time to draw the eyes. Jerry has large, oval-shaped eyes that are slightly angled upwards. Draw two ovals that intersect with the horizontal line. Make sure to leave a small space between the two eyes. Then, draw two smaller circles inside each eye for the pupils.
Step 4: Draw the Nose

Jerry’s nose is small and triangular in shape. Draw a triangle shape below the eyes where the vertical line intersects with the horizontal line.
Step 5: Draw the Mouth
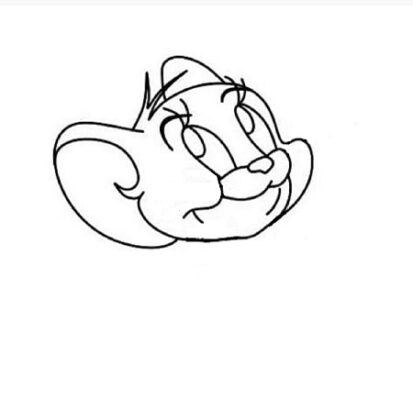
Jerry’s mouth is small and triangular in shape, just like his nose. Draw a small triangle shape below the nose.
Step 6: Draw the Whiskers
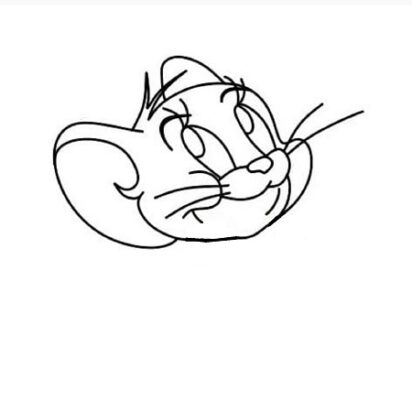
Jerry’s whiskers are one of his most recognizable features. Draw three lines on either side of the nose, extending outwards. Then, draw three smaller lines on each side that curve downwards.
Step 7: Add the Body

Now that you have drawn the head, it’s time to add the body. Draw a small, curved line underneath the head for the neck. Then, draw a large, curved line for the back and a smaller curved line for the belly.
Step 8: Draw the Arms and Legs

Jerry’s arms and legs are short and stubby. Draw two small, curved lines on either side of the body for the arms. Then, draw two more small, curved lines on either side for the legs. Add small circles at the end of each line for the hands and feet.
Step 9: Add the tail Jerry Mouse

Step 10: Color Jerry Mouse

Tip On How to Draw Jerry Mouse Step by Step
- Drawing Jerry Mouse can be a fun and rewarding experience, but it can also be challenging if you’re new to drawing cartoons. Here are some tips to help you draw Jerry Mouse step by step:
- Practice Basic Shapes: Jerry Mouse is made up of basic shapes such as circles, ovals, and triangles. Before attempting to draw Jerry Mouse, practice drawing these basic shapes so that you become comfortable with them.
- Use Guidelines: Guidelines are important when drawing Jerry Mouse. They help you position the facial features in the correct place and ensure that the proportions of the head and body are correct. Remember to draw lightly so that you can erase the guidelines later.
- Study Jerry Mouse: Take a closer look at Jerry Mouse from different angles and in different poses. Pay attention to the details such as the shape of his eyes, the position of his whiskers, and the size of his ears. This will help you understand the character better and make your drawing more accurate.
- Use Reference Images: Reference images can be a great help when drawing Jerry Mouse. Look for high-quality images of Jerry Mouse from different angles and in different poses. This will give you a better understanding of how the character looks and help you create a more accurate drawing.
- Be Patient: Drawing Jerry Mouse takes time and patience. Don’t rush the process and take your time to get the details right. If you make a mistake, don’t worry, simply erase it and try again.
- Experiment: Once you have mastered the basics of drawing Jerry Mouse, don’t be afraid to experiment with different styles and techniques. This will help you develop your own unique style and make your drawings stand out.
FAQs On How to Draw Jerry Mouse Step by Step
Here are some frequently asked questions (FAQs) about how to draw Jerry Mouse step by step:
Q: How do I draw Jerry Mouse’s eyes?
A: Jerry Mouse’s eyes are oval-shaped and slightly angled upwards. Draw two ovals that intersect with the horizontal line you drew in Step 2. Then, draw two smaller circles inside each eye for the pupils.
Q: What is the best way to draw Jerry Mouse’s whiskers?
A: Jerry Mouse’s whiskers are an important feature of his character. To draw them, start by drawing three lines on either side of the nose, extending outwards. Then, draw three smaller lines on each side that curve downwards.
Q: How do I draw Jerry Mouse’s ears?
A: Jerry Mouse’s ears are large and round. Draw two curved lines on either side of the head that meet at the top to form the ears.
Q: How do I draw Jerry Mouse’s body?
A: Jerry Mouse’s body is made up of a small, curved line for the neck, a large, curved line for the back, and a smaller curved line for the belly. Draw these lines to form the basic shape of Jerry’s body.
Q: What materials do I need to draw Jerry Mouse?
A: To draw Jerry Mouse, you will need a pencil, eraser, paper, and optionally, colored pencils or markers to add color to your drawing.
Q: Can I draw Jerry Mouse in different poses?
A: Yes, once you have mastered the basic steps for drawing Jerry Mouse, you can experiment with different poses and positions. Study reference images of Jerry Mouse in different poses to help you draw him in different positions.
Q: How long does it take to learn how to draw Jerry Mouse?
A: Learning to draw Jerry Mouse takes time and practice. It may take a few attempts before you are able to draw him accurately. Keep practicing and experimenting with different styles and techniques to improve your drawing skills.
Your Jerry Mouse is Completed!
You have now learned how to draw Jerry Mouse step by step. With practice, you will be able to draw Jerry Mouse effortlessly and create your own unique cartoon character. Keep practicing and experimenting with different styles to improve your drawing skills.
