Bees are fascinating creatures that play a crucial role in our ecosystem. If you’re interested in learning how to draw a bee step by step, this article will guide you through the step-by-step process.
How To Draw A Bee Step By Step Easy For Kids

Step 1

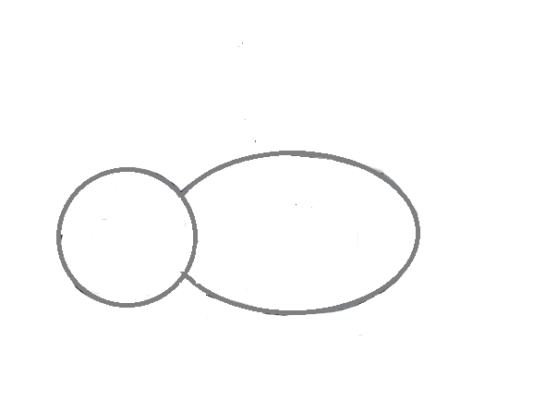
Start by drawing a circle for the bee’s head and another larger circle for its body.
Step 2:

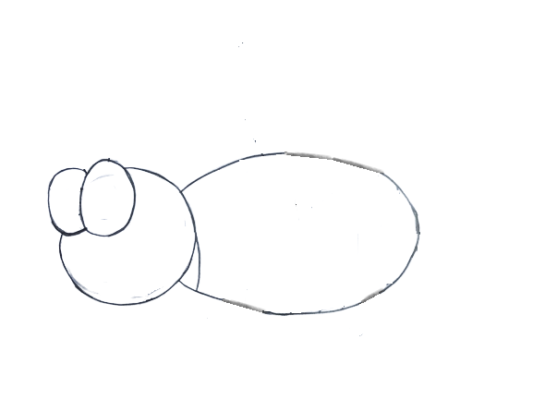
Add a smaller oval shape at the top of the bee’s head for the eyes.
Step 3:

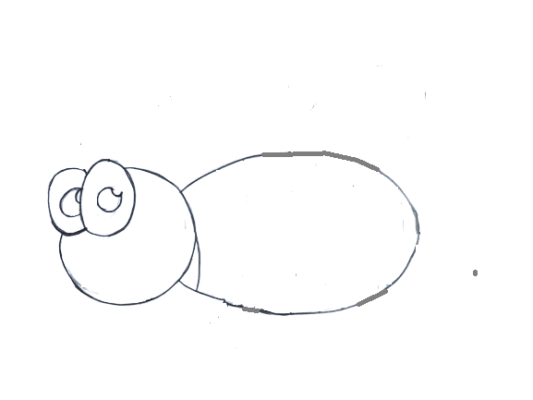
Draw two small circles inside the eyes, one for the pupil and another for reflection.
Step 4:

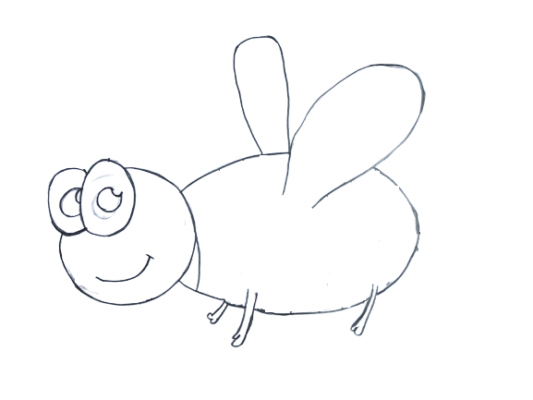
Add two curved lines on each side of the bee’s body for the wings.
Step 5:

Draw two small, thin legs on each side of the bee’s body.
Step 6:

Add stripes to the bee’s body by drawing several horizontal lines across it.
Step 7:

You can also add details like antenna and a smiley face to make your bee look even cuter.
Step 8 Coloring A Bee

Some Tips On How To Draw A Bee
- Start with basic shapes: Begin by drawing simple shapes, such as ovals and circles, to create the bee’s body, head, wings, and legs.
- Keep proportions in mind: Be sure to keep the size and shape of each body part in proportion to the other parts. This will make your bee look more realistic.
- Use light lines: When you first start sketching your bee, use light lines so you can easily erase and adjust your drawing as needed.
- Add details gradually: Once you have the basic shapes in place, start adding details such as eyes, antennae, stripes, and small hairs.
- Observe real bees: Look at photos or observe real bees to get a sense of how they look and move. This will help you add more detail and realism to your drawing.
- Experiment with shading: Use shading techniques such as cross-hatching or stippling to give your bee depth and dimension.
- Have fun with color: Experiment with different shades of yellow and black to give your bee a unique look. Don’t be afraid to add other colors, such as white or gray, to highlight certain features.
FAQs On How To Draw A Bee
I’m not good at drawing. Can I still draw a bee?
- Yes, absolutely! Anyone can draw a bee with a little bit of practice and patience. Just follow the steps and tips above and take your time.
What kind of paper should I use?
- You can use any kind of paper you like for drawing a bee. If you’re just starting out, it’s a good idea to use a pencil and a piece of plain white paper.
What kind of pencils should I use?
- Any kind of pencil will work, but a regular HB pencil is a good place to start. You can also try using different hardness levels of pencils (e.g. 2B, 4B, 6B) to create darker lines and shading.
How do I shade my bee?
- You can shade your bee by using techniques such as cross-hatching, stippling, or blending with a blending tool or your finger. Experiment with different techniques to see which one you prefer.
Can I draw a bee in a different pose or angle?
- Absolutely! Once you have the basic steps down, you can experiment with different poses and angles to create a more dynamic drawing.
Can I use other colors besides yellow and black?
- Yes, you can use any colors you like to give your bee a unique look. Just be sure to use colors that are commonly found on bees, such as white or gray.
Congratulations, you have draw a bee!
In conclusion, drawing a bee step by step can be a fun and engaging activity for both beginners and experienced artists. The first step is to gather the necessary materials, such as a pencil, eraser, and paper. Next, sketch out the basic shapes and lines of the bee’s body and wings. Then, add details such as stripes, eyes, and antennae. Don’t forget to shade in the appropriate areas to create a sense of depth and texture. Finally, add any additional details or background elements to complete the drawing. With practice and patience, anyone can create a realistic and detailed bee drawing.
