Learning how to draw a bike step by step is an exciting experience. Drawing is an essential skill that requires patience, practice, and a keen eye for detail. Whether you want to create an illustration of your favorite bike or just enhance your artistic ability, this article will guide you through the process of drawing a bike.
Before we get started, it’s essential to note that drawing a bike can be challenging, especially for beginners. However, with practice, you can master this skill and create stunning illustrations. Here are the steps you should follow how to draw a bike successfully.
How to Draw A Bike Step by Step Guide For Kids

Step 1: Start With the Frame
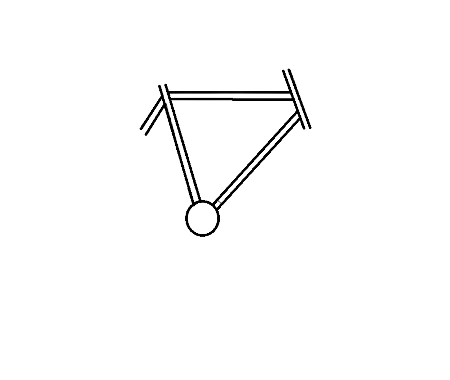
The first step in drawing a bike is to draw the frame. Begin by drawing a long vertical line to represent the seat post. Draw a horizontal line at the top of the seat post to create the top tube. Next, draw a diagonal line from the top of the seat post to the head tube. This line will form the down tube.
Draw a small horizontal line at the bottom of the down tube to create the bottom bracket. From the bottom bracket, draw two diagonal lines to form the chainstays. Finally, draw a horizontal line to connect the chainstays to the seat post. This line will create the seat stays.
Step 2: Add the Wheels
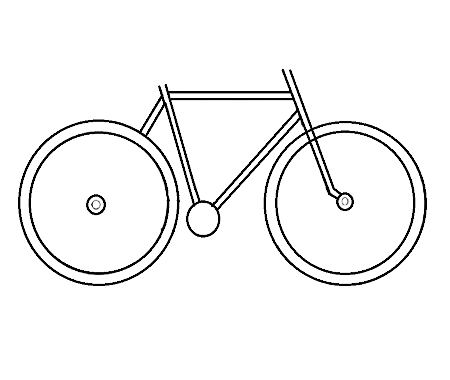
Now that you have drawn the frame, it’s time to add the wheels. Draw two circles on either side of the frame to create the wheels. Make sure that the circles are proportionate to the frame and aligned with each other. Draw the tires by sketching an oval around the circumference of each wheel.
Step 3: Draw the Handlebars and Fork
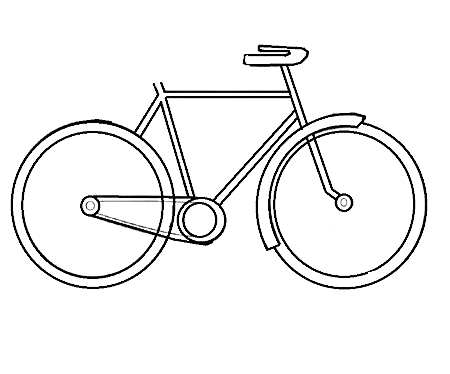
To draw the handlebars, draw a line extending from the head tube. Draw another line perpendicular to the first line to create the handlebar stem. Draw two curved lines extending from the stem to create the handlebars. You can add more detail to the handlebars by adding grips, brakes, or a bell.
Next, draw the fork by drawing two curved lines extending from the head tube to the front wheel. Draw the fork blades by drawing two straight lines from the fork crown to the dropouts.
Step 4: Add Details
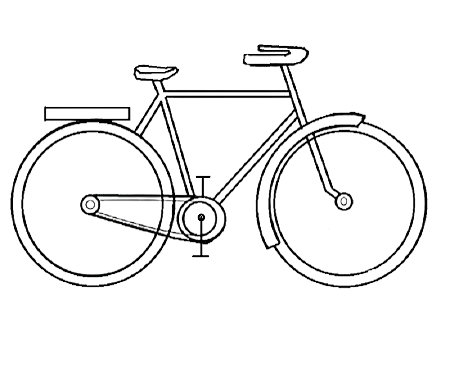
Now that you have drawn the basic components of the bike, it’s time to add details. You can add a seat by drawing a curved line on top of the seat post. Draw pedals by sketching two circles on the bottom bracket. You can add more details such as reflectors, water bottle cages, or gears to make your drawing more realistic.
Step 5: Draw the spokes

Draw the spokes by drawing straight lines from the hub of the wheel to the rim. Make sure that the spokes are evenly spaced and aligned.
Step 6: Color a Bike
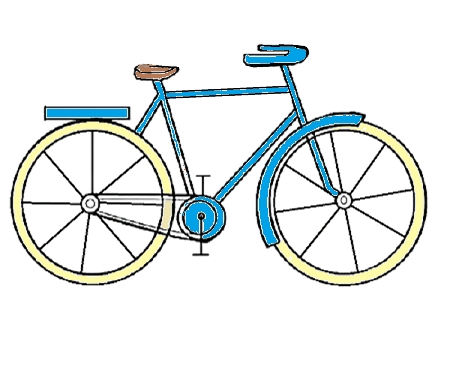
Finally, it’s time to shade and color your drawing. Use your pencils, markers, or watercolors to add depth and dimension to your drawing. Shade the areas that would be in shadow, such as under the frame or the wheels. Add highlights to areas that would be reflecting light, such as the spokes or the frame. Choose colors that match the bike you are drawing or use your creativity to create a unique color scheme.
Tip On How to Draw A Bike
- Start with a rough sketch: Before you start drawing, make a rough sketch of what you want to draw. This will help you get a better understanding of the proportions and placement of the various components.
- Use references: If you have trouble visualizing how a particular part of the bike should look, use references. You can use images of bikes online or from magazines to get a better understanding of how things should look.
- Focus on proportions: Getting the proportions right is crucial to make your drawing look realistic. Take time to measure and compare the sizes of the various parts of the bike.
- Don’t be afraid to make mistakes: Making mistakes is a part of the learning process. Don’t be afraid to make mistakes, as they can help you understand what works and what doesn’t.
- Practice: The more you practice, the better you will get. Don’t get discouraged if your first few attempts are not perfect. Keep practicing, and soon you will be able to draw a bike with ease.
FAQs On How to Draw A Bike
Q: How long does it take to learn how to draw a bike step by step?
A: Learning how to draw a bike step by step can take time and practice. The amount of time it takes to learn depends on your level of experience and how much time you dedicate to practicing.
Q: What materials do I need to draw a bike?
A: To draw a bike, you will need a pencil, eraser, paper, and a ruler. Additionally, you can use colored pencils, markers, or watercolors to add more depth and detail to your drawing.
Q: What are some common mistakes beginners make when drawing a bike?
A: Common mistakes beginners make when drawing a bike include incorrect proportions, misaligned components, and lack of detail. It’s essential to pay attention to the details and take your time to get the proportions right.
Q: How can I make my bike drawing look more realistic?
A: To make your bike drawing look more realistic, focus on getting the proportions right and adding detail. Use shading and color to add depth and dimension to your drawing.
Q: Can I draw a bike from memory, or do I need to use references?
A: While it is possible to draw a bike from memory, it’s always a good idea to use references. Using references will help you get a better understanding of the proportions and placement of the various components.
Q: What are some tips for drawing the wheels of a bike?
A: When drawing the wheels of a bike, it’s important to make sure they are proportionate to the frame and aligned with each other. You can also add depth to the wheels by shading the areas that would be in shadow and highlighting the areas that would be reflecting light.
Q: What are some tips for drawing the handlebars of a bike?
A: To draw the handlebars of a bike, start by drawing a line extending from the head tube. Draw another line perpendicular to the first line to create the handlebar stem. Draw two curved lines extending from the stem to create the handlebars. You can add more detail to the handlebars by adding grips, brakes, or a bell.
Q: How can I add more detail to my bike drawing?
A: You can add more detail to your bike drawing by adding features such as reflectors, water bottle cages, or gears. You can also use shading and color to add depth and dimension to your drawing..
Q: Can I draw a bike in any style I want?
A: Yes, you can draw a bike in any style you want. Whether you want to draw a realistic bike or a more stylized version, the key is to focus on getting the proportions right and adding detail to make the drawing look complete.
Your Bike Is Completed!
Drawing a bike step by step can be a challenging but rewarding experience. By following these steps, you can create a stunning illustration of a bike. Remember to be patient, practice, and pay attention to detail. Don’t be afraid to make mistakes, as they are an essential part of the learning process. Keep practicing, and soon, you will be able to draw bikes effortlessly.
