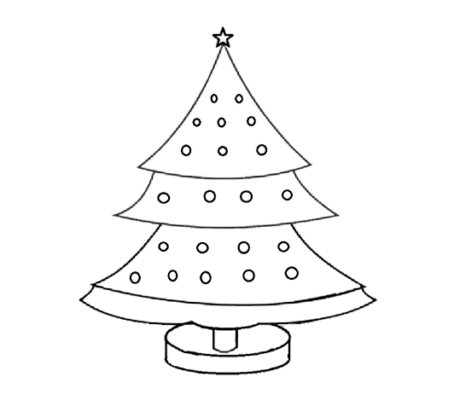
As the holiday season approaches, one of the most iconic symbols of Christmas is the evergreen Christmas tree. Whether you’re an artist looking to create a festive greeting card or a parent seeking a fun holiday activity with your kids, learning how to draw a Christmas tree step by step can be a delightful and rewarding experience.
In this article, we’ll provide a comprehensive guide on how to draw a Christmas tree, beginning with the basic shapes and progressing through to the final details. You can find helpful tips and tricks to create a beautiful and unique Christmas tree drawing.
How to Draw A Christmas Tree – Let’s Start!

Step 1: Sketch the Basic Shape

To start your drawing, begin by sketching the basic shape of the Christmas tree. Draw a vertical line on your paper to represent the trunk of the tree. Then, draw two diagonal lines that meet at the top of the trunk to form a triangle. This triangle will be the main body of the tree.
Step 2: Add Branches

Next, draw several horizontal lines across the triangle to represent the branches of the tree. These lines should be drawn in a slightly curved shape to give the tree a natural look. Be sure to make the bottom branches longer and wider than the ones at the top, as this will create a more realistic perspective.
Step 3: Add Details

Once you’ve drawn the basic shape and branches of the tree, it’s time to add some details. Draw a star at the top of the tree, and add decorations such as ornaments, tinsel, and lights to the branches. To make the tree look more realistic, add some shading and texture to the branches by drawing small lines and dots.
Step 4: Add Final Touches

Finally, add any final touches to your drawing. You can add a background, snowflakes, or other holiday elements to create a complete scene. Don’t forget to sign your drawing and share it with your friends and family!
Step 5: Color the Tree

Now that your tree is fully sketched and detailed, it’s time to add some color. Traditionally, Christmas trees are green, but feel free to use any colors you like to make your drawing unique. You can use colored pencils, markers, or watercolors to color your tree.
Tips and Tricks for Drawing a Christmas Tree
- Use a reference photo: If you’re having trouble drawing a Christmas tree from memory, try using a reference photo to guide your drawing.
- Vary the shapes of the branches: To make your tree look more interesting, try varying the shapes of the branches. Some branches can be curved, while others can be straight.
- Experiment with colors: Don’t be afraid to experiment with different colors to make your tree stand out. You can try using metallic colors for ornaments, or shades of blue or purple for a unique twist on a traditional green tree.
- Use shading and texture: Adding shading and texture to your tree can make it look more realistic. Use small lines and dots to create the texture of needles and branches.
FAQs On How to Draw A Christmas Tree
Q: What materials do I need to draw a Christmas tree?
A: All you need is paper and a pencil to draw a Christmas tree. However, you can also use colored pencils, markers, or watercolors to add color to your drawing.
Q: What size should I make my Christmas tree drawing?
A: The size of your Christmas tree drawing is up to you. You can make it as large or as small as you like. If you’re creating a card or decoration, consider the size of the final product you want to create.
Q: Can I use a different shape for the tree instead of a triangle?
A: Yes, you can use any shape you like for the tree. However, keep in mind that a triangle is the traditional shape for a Christmas tree and may make your drawing more recognizable.
Q: How do I make my tree look more realistic?
A: To make your tree look more realistic, add shading and texture to the branches by drawing small lines and dots. Vary the shapes of the branches and add details such as ornaments and lights.
Q: Can I use a reference photo to guide my drawing?
A: Yes, using a reference photo can be helpful in guiding your drawing. Look at photos of Christmas trees online or in magazines to get ideas for your drawing.
Q: How can I make my drawing unique?
A: You can make your drawing unique by experimenting with different colors, adding your own details, and varying the shapes of the branches. Try using metallic colors for ornaments or adding snowflakes to your background for a unique touch.
Your Christmas Tree Is Completed!
Drawing a Christmas tree can be a fun and rewarding experience for artists of all skill levels. By following the step-by-step guide and tips and tricks outlined in this article, you’ll be able to create a beautiful and unique Christmas tree drawing. Whether you’re creating a holiday card, decorating your home, or just looking for a fun activity, drawing a Christmas tree is the perfect way to get into the festive spirit.
