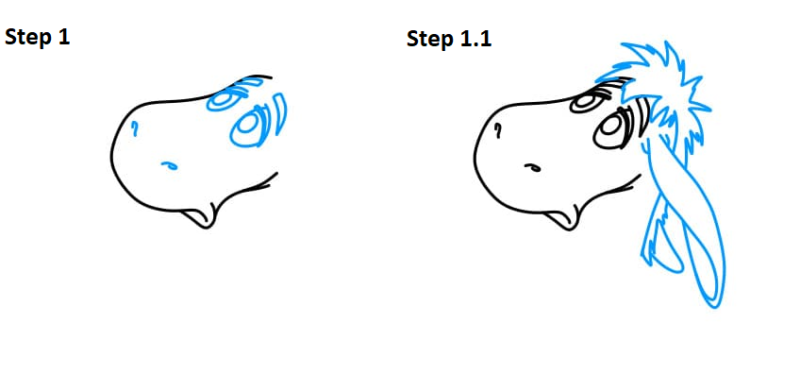
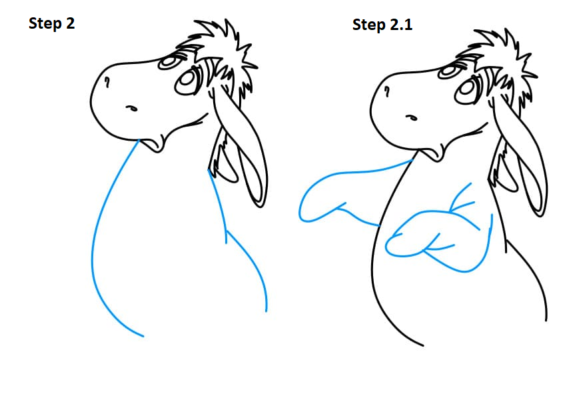
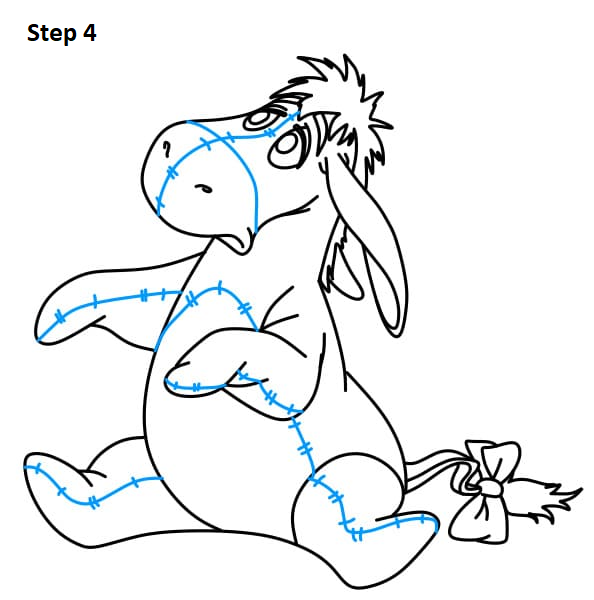
How to Draw Eeyore step by step? If you are a fan of Winnie The Pooh’s characters and you love drawing, you are in the right place!You will learn to Draw Eeyore one of the most beloved characters in the series: Eeyore! Eeyore is a melancholic and pessimistic donkey who has conquered our hearts with his unique personality. With this tutorial, you can capture its paper charm and become an artist of the drawing.
WHO IS EEYORE?

Eeyore is a fictional character created by author A.A. Milne in her stories of Winnie The Pooh. He is known for his sad and pessimistic character, and is one of Pooh’s best friends and his friends in the hundred acres forest.
REASON TO DRAWING EEYORE
Drawing Eeyore will allow you to express your creativity and artistic skills. In addition, it will give you a moment of relaxation and fun, since drawing is an activity that stimulates concentration and helps reduce stress.
Step 1: Preparation

Gather the necessary materials
Before starting your drawing, you will need to make sure you have all the necessary materials. Remember that the most important thing is a pencil and paper, but you can also use colors if you want to color your drawing at the end.
Prepare your work space
Find a quiet and well -lit place to make your drawing. Be sure to have enough space on your table to move comfortably and have everything you need at your fingertips.
Step 2: Drawing of the basic forms

Draw a head circle
Start drawing a circle in the center of your role. This will be the starting point to give life to the head of Eeyore.
Draw an oval for the body
under the circle of the head, draw a slightly elongated oval. This will be Eeyore’s body, so you should make sure to adjust its size in relation to the head.
Step 3: Facial details

Draw the Eeyore Eyes
Add two small circles inside the head circle to represent Eeyore’s eyes. Then add the pupils with small points in the center of the circles.
Draw the nose and mouth
just below the eyes, draw a small oval shape for Eeyore nose. Then, draw a curved line under the nose to represent your mouth.
Step 4: Body and limbs

Draw the body’s contour
Continue drawing Eeyore’s body by adding curved lines to define your shoulders and back. Then, draw two curved lines in the form of “”s”” on the sides of the body oval to represent its front limbs.
Add the legs and ears
At the bottom of the body’s oval, draw two rectangular forms to represent the sear legs. Then, add two elongated and curved shapes at the top of the head to represent its ears.
Step 5: Colored and final details

Color to Eyore with the right colors
Use colors such as gray and light blue to give life to Eeyore. You can wear colored pencils, markers or any other choice technique to color your drawing.
Add details such as your hair and tail
Don’t forget to give your final touches to your drawing. Add the details such as Eeyore’s hair and tail with fine lines and curves.
Conclusion
FINISH YOUR EEYORE DRAW
Congratulations! You have successfully completed your Eeyore drawing. Now you can boast your talent as an artist and share your creation with your friends and loved ones. Remember that the practice does the teacher, so do not hesitate to continue drawing and exploring your creativity.
Frequently Questions
Should I be an expert in drawing to follow these steps?
No, these steps are adequate for both beginners and those with more experience in drawing. You just need to follow the instructions and practice.
How long will you take to draw Eeyore following these steps?
The time you will take the drawing will depend on your level of skill and speed. It can take from a few minutes to an hour.
Can I draw Eeyore in different poses?
Yes, once you have dominated these steps, you can experiment with different poses and facial expressions to create even more eeyore dynamic drawings.
What other Winnie the Pooh characters can draw following this method?
This method can be applied to other Winnie The Pooh characters, such as Winnie The Pooh, Piglet, Tigger and the rest of his friends. Just let your imagination fly!
