Fish are fascinating creatures that have captured the imagination of people for centuries. They come in all shapes and sizes and are found in various bodies of water, from tiny streams to vast oceans. Drawing fish can be a fun and rewarding hobby, and it is a great way to improve your artistic skills. In this article, we will show you how to draw fish step by step.
Step By Step Guide Drawing Fish

Step 1: Start with Basic Shapes

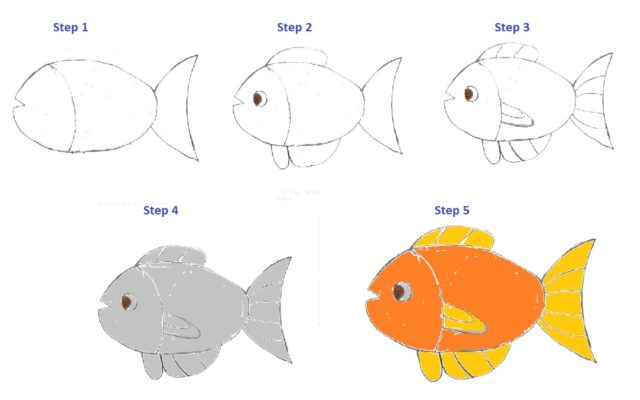
The first step in drawing a fish is to start with basic shapes. We will begin with a simple fish shape that consists of an oval for the body and a triangle for the tail. Draw the oval horizontally and slightly elongated, with a pointed end at one side. This will be the body of your fish.
Next, draw a triangle with its point facing downwards to represent the tail. The base of the triangle should be attached to the pointed end of the oval. You can adjust the size of the tail according to the size of the fish you want to draw.
Step 2: Sketch in the Fins and Eye

In this step, we will sketch in the fins and eye of the fish. For the fins, draw two small triangles at the top of the fish’s body, and two more at the bottom. The upper fins are called the dorsal fins, while the lower ones are the ventral fins.
Next, draw a large triangle on the side of the fish’s body, about a third of the way from the head to the tail. This will be the pectoral fin, which is used for steering and braking. You can also draw a smaller triangle near the tail, which is the anal fin.
Now, sketch in the fish’s eye. The eye should be oval-shaped and placed near the top of the head, close to the dorsal fin. Draw a small circle inside the oval to represent the pupil.
Step 3: Add Detail to the Fish’s Body

In this step, we will add detail to the fish’s body. Start by drawing a line down the center of the fish’s body to represent the spine. Next, draw a series of curved lines on each side of the spine to represent the muscles.
Draw another curved line that starts at the top of the fish’s head and goes all the way to the back of the body. This line will divide the fish’s body into two parts, the upper and lower body.
Add some texture to the fish’s body by drawing small, irregular shapes that represent scales. These scales should be larger near the head and get smaller as they move towards the tail.
Step 4: Shade and Add More Detail

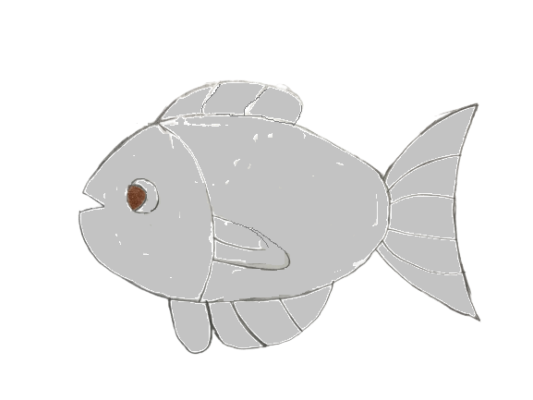
In this step, we will shade the fish to give it more depth and dimension. Start by shading the upper part of the fish’s body with a darker pencil. The shading should start near the dorsal fin and gradually fade as it moves towards the tail.
Next, shade the lower part of the fish’s body with a lighter pencil. This shading should start near the anal fin and gradually get darker as it moves towards the tail.
Add more detail to the fish’s fins by drawing lines that represent the rays of the fins. These lines should radiate out from the base of each fin towards the edges.
Finally, add some bubbles around the fish to give the impression that it is swimming. Draw small circles of varying sizes around the fish’s body, with larger ones near the head and smaller ones towards the tail.
Step 5: Final Touches and Coloring

In this final step, we will add some final touches to our fish drawing. First, use an eraser to clean up any stray lines or smudges. Then, add some highlights to the fish’s body and fins to make them look shiny.
To create highlights, use a white pencil or pastel to draw small, circular shapes on the fish scales and fins. These highlights should be placed in areas that would catch the most light, such as the top of the fish’s head, the edges of the fins, and the tips of the scales.
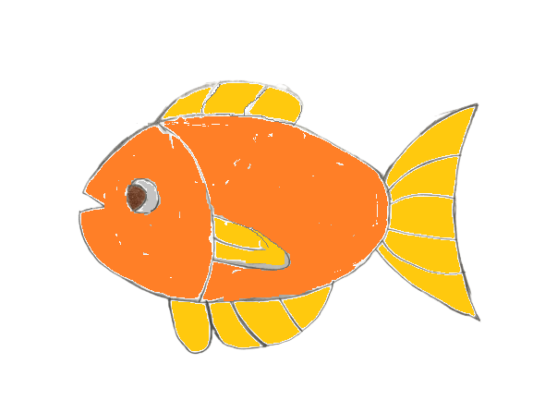
You can also add some color to your fish drawing. Depending on the species of fish you are drawing, you can use a variety of colors to make your fish look more realistic. For example, a rainbow trout has a pinkish hue on its belly and greenish-blue on its back.
Use colored pencils or watercolor paints to add color to your fish. Start by laying down a base color, then add darker shades to create depth and dimension. Finally, add highlights in lighter shades to make the colors pop.
Conclusion:
Drawing fish coloring pages can be a fun and rewarding activity, and it is a great way to improve your artistic skills. By following the steps outlined in this article, you can learn how to draw fish step by step. Remember to start with basic shapes, sketch in the fins and eye, add detail to the body, shade and add more detail, and finish with final touches.
Once you have mastered the basic steps, you can experiment with different species of fish and add your own creative touches. Whether you are a beginner or an experienced artist, drawing fish can be a great way to relax, express your creativity, and create beautiful works of art.
Tag: How to draw fish step by step, Drawing fish, How to draw a cute fish, Fish drawing with colour, Image of Fish art drawing, Fish art drawing, Image of Drawing fish, How to draw a fish in water step by step
