Drawing an elephant can seem intimidating, but with a step-by-step process, you can create a beautiful elephant drawing. Drawing is a wonderful hobby that allows us to unleash our creativity and express ourselves. One of the most popular subjects to draw is the elephant. If you want to learn how to draw a elephant step by step easily, then you’ve come to the right place. In this article, we will guide you through the process of drawing an elephant that looks realistic and beautiful.
How to Draw a Elephant – Let’s Start!

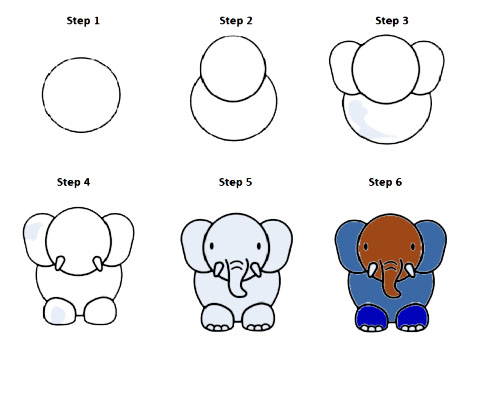
Step 1: Sketch the Body

Start by drawing a large oval shape for the body of the elephant.
Step 2: Add the Head

Add a smaller oval shape on top of the body for the head.
Step 3: Add the Ears

On either side of the elephant’s head, add two large ears using curved lines.
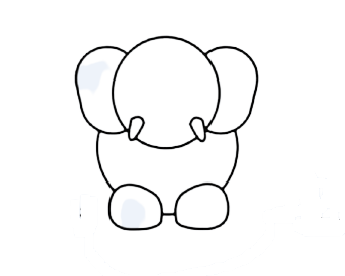
Step 4: Draw the Legs and Feet

- Add four long, thin legs to the bottom of the elephant’s body.
- At the end of each leg, draw a large, oval-shaped foot.
Step 5: Draw the Trunk, Eyes, Tusks

- From the bottom of the head, draw a long and curved line that will form the elephant’s trunk.
- Draw two small circles on the elephant’s head for eyes.
- Add two long, curved lines at the bottom of the elephant’s head for tusks.
Step 6: Finalize the Drawing

The final step is to finalize the drawing. Clean up any rough lines or mistakes, and add any final details that you may have missed. You can also add some color to the drawing if you like. Elephants are typically gray, but you can use different shades of gray and brown to give the drawing more depth and dimension.
Some Tips On How To Draw A Elephant
- Use reference images: If you’re having trouble drawing an elephant from memory, then use reference images to help guide you. There are plenty of images of elephants available online that you can use as a reference.
- Practice the shapes: Drawing elephants can be challenging, so make sure to practice the basic shapes before adding any details. This will help you get a better understanding of the overall structure of the elephant.
- Start with light lines: When drawing the basic shapes, start with light lines so that you can easily erase any mistakes. Once you’re happy with the shapes, then you can start adding more detail and texture.
- Don’t be afraid to make mistakes: Drawing is all about practice, so don’t be afraid to make mistakes. If you’re not happy with a certain part of the drawing, then just erase it and try again.
FAQs On How To Draw A Elephant
What materials should I use to draw an elephant?
- You can use any drawing materials you are comfortable with, such as pencils, pens, or markers, and any type of paper. You may also want to consider using a reference image or video of an elephant to help with your drawing.
What are the basic shapes for drawing an elephant?
- To draw an elephant, you can start with basic shapes such as circles, ovals, and rectangles. Use a circle for the head, ovals for the body and limbs, and rectangles for the tusks.
How do I draw the elephant’s trunk?
- The trunk is one of the most distinctive features of an elephant. Start by drawing a curved line for the top of the trunk, then add another curved line below it to create the underside. Add details such as wrinkles and folds to make the trunk look more realistic.
How do I draw the elephant’s ears?
- Elephants have large, floppy ears that are a key feature of their appearance. To draw the ears, start with a large, oval shape and then add details such as ridges and folds.
How do I draw the elephant’s tusks?
- Tusks are another distinctive feature of elephants. To draw the tusks, use rectangular shapes that extend from the elephant’s mouth. Add details such as lines and shading to make them look more realistic.
How do I add shading to my elephant drawing?
- Shading is an important part of creating depth and dimension in your elephant drawing. To add shading, use a pencil or marker to add darker tones to areas that would be in shadow, such as the elephant’s body and legs. You can also experiment with hatching or crosshatching to create texture and depth.
Can I use digital tools to draw an elephant?
- Yes, you can use digital tools such as a tablet and drawing software to draw an elephant. There are many free and paid drawing apps available for both desktop and mobile devices.
Conclusion Draw A Elephant
Drawing an elephant may seem like a daunting task, but with some practice and patience, anyone can do it. Start by drawing the basic shapes, refine them, add the details, and finalize the drawing. Use reference images to help guide you, and don’t be afraid to make mistakes. With these tips in mind, you’ll be drawing beautiful elephants in no time.
